There are two types of prototypes:
- Paper prototypes: low fidelity prototype, hand sketches.
- Digital prototypes: high fidelity prototype, computer-created prototypes.
Watch the following video from 5:55 until the end:
Transcription
Once you’ve got a rough idea of what your application’s going to accomplish, you can start to think about how you’re going to implement that, and by implement I mean “What’s it going to look and feel like to the user? What’s the actual user interface is going to be?”
And for figuring out the user interface at an early stage, the very best technique that I know is to use paper prototyping.
Paper prototyping is exactly what it sounds like: You’re going to make a mockup of the user interface, and, instead of doing it on the computer, which can take a lot of time and encourage you to try to get it beautiful and exact, you’re going to use paper, Post-It notes, and markers, to sketch things out really quickly.
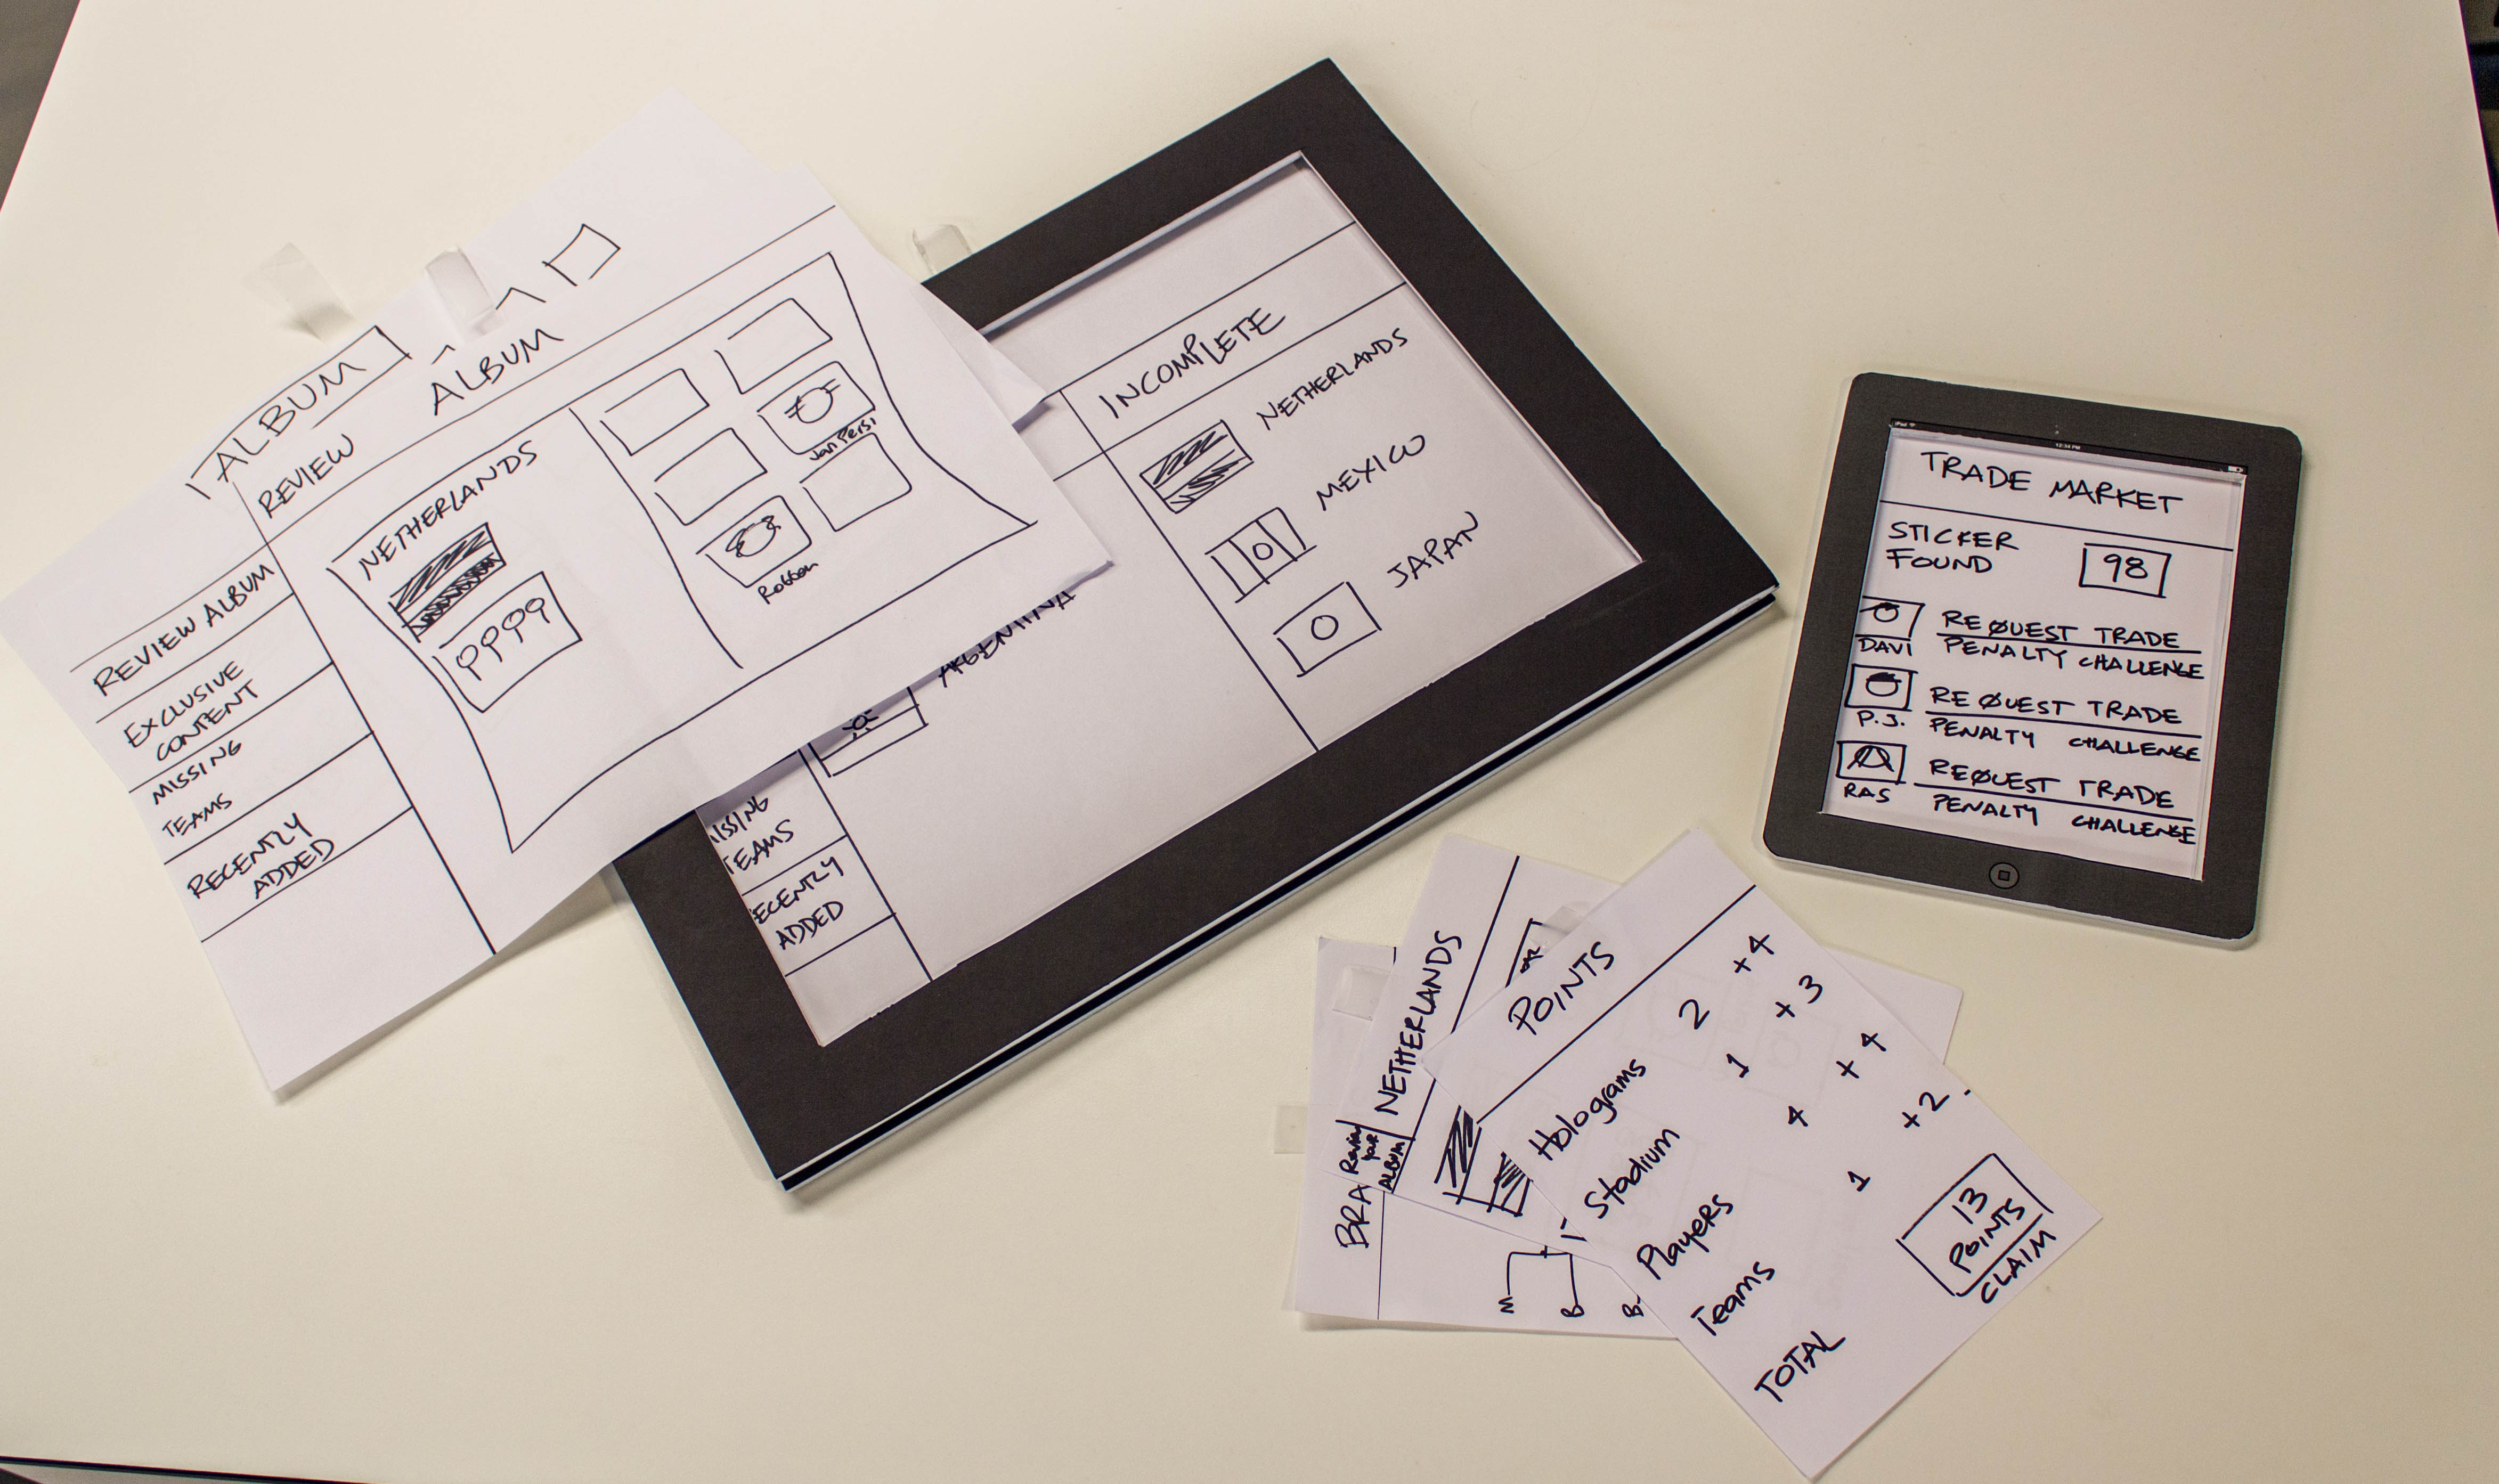
Here’s an example, it’s again from the “Lifealyfics” team.
These are the paper prototypes that they made:
(Lifealyfics / Discover What Makes You Happy / (Begin) Here’s How It Works / 1. We’ll send you random texts throughout the day, at the frequency you select. / 2. You input your [illegible] and activity / (Then What?) 3. At the end of the week, we’ll send you your results, and you’ll realize what makes you happy and fulfilled! / (Start) Step 1 of 3 / Enter phone number [text field] / (Next) The more texts you respond to, the more accurate your personal graph will be! / How many texts per day do you want to receive? [dropdown] Step 2 of 3 / How many times per day do you want to get a text? Step 2 of 3 / How many times per day do you want to get a text? / (Next) Step 3 of 3 / Earliest text: [dropdown] / Latest text: [dropdown] / (Next) )
Here’s some tips for making effective paper prototypes:
First, store all your materials in one place. You’re going to want to get a bucket of markers, maybe some Post-It notes or index cards.
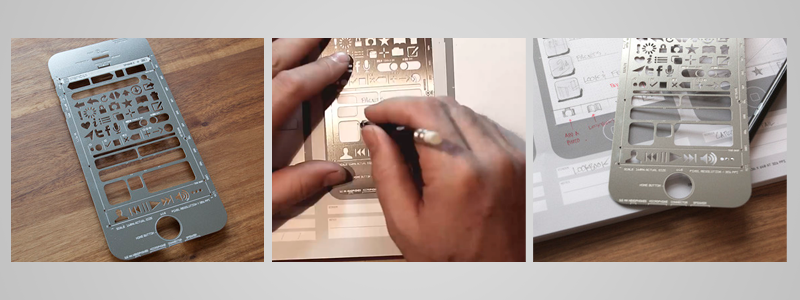
If you’ve got a mobile device that you’re simulating, you might even make a mockup of something like that, and you can slide in and out different interface widgets.
Just like the storyboards, it’s important to work quickly.
And if you had a widget that you’re going to use a lot of — like radio buttons or sliders or something like that — sometimes it can be faster to photocopy them on a photocopier, so you can make one version and then photocopy it to have a whole bunch.
Sometimes, good paper prototyping is kind of like playing make-believe as a kid. So, if you’ve got something that’s complicated or highly interactive, you can just imagine what it would be like, and so you can role-play that out with the person who’s trying out your application.
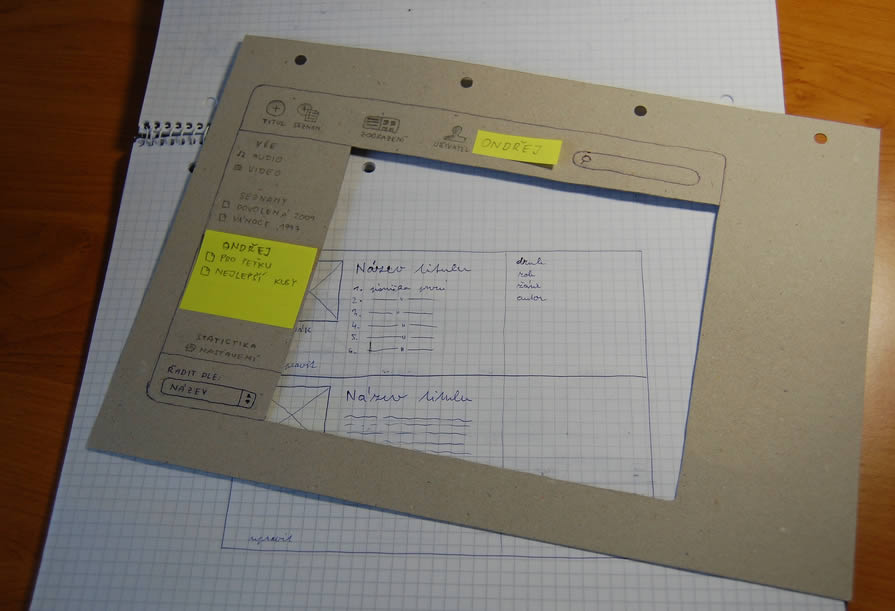
It can be helpful to have a frame to put your interface widgets in. Here we have a mobile frame.
You can also stick things right on the device itself, So, if you want to make a mobile screen shot here, Mobile user interface!
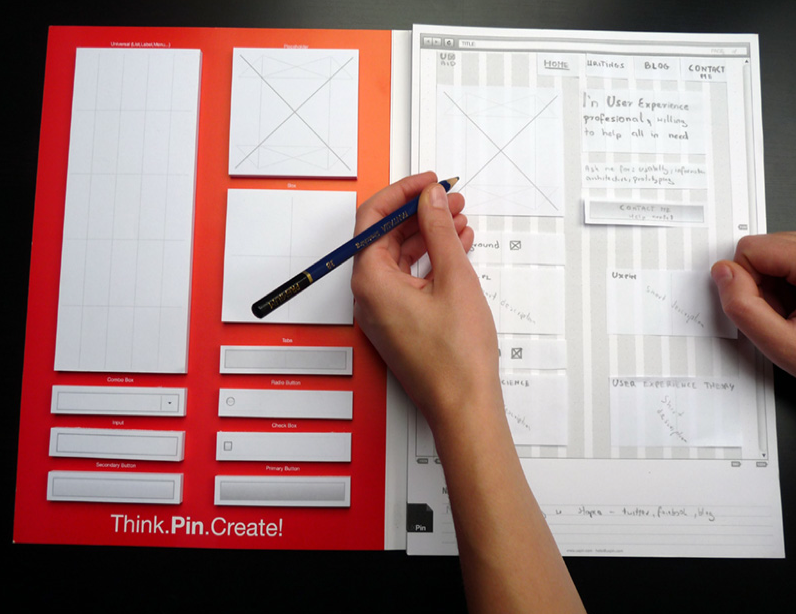
Or, if you have a desktop user interface, you can take, like, a 11-by-14 sheet of poster board and put all of your elements on that.
Good paper prototyping is also like collage — you can mix and match fidelities.
So you can use printouts of actual screen shots; draw and annotate on top of that — anything that you want that can get your point quickly. And to help the person who’s trying out the prototype make the conceptual leap between the sketch on paper and an interactive system, you can add in a little widgets and chrome of your user interface to convey that it’s part of a larger operating system.
Paper prototyping is not only fast and efficient; it’s also really fun, and you can get really creative in figuring out different ways to convey interactions.
If you’ve got layers in your user interface, you can use transparencies as a way of showing them.
If you have popup menus, you can make the back sticky, so that can stay on the right place on top of the main interface.
You [can] use any kind of marker or pen you want; you can have things be coloured, [or] just black-and-white — Anything you can think of.
You can use poster board (like this), or cardboard, index cards, foamcore — anything you want as a backing material.
Things like tape are handy to have around.
If you’d like to be able to have repeatable user input, you can use whiteboard markers or transparency pens, and have a whiteboard or a sheet or transparency that the user input goes on, and then you can take it away when you’re done.
To be able to add structure to your user interface, you can have line widths of different thicknesses.
So, you can have a thicker line that’s for the major elements, and a thinner line for the minor elements.
And you can have a stack or either Post-It notes or index cards to show the tab panes of your user interface. So, the different layers can be on sheets beneath.
Here you can see a wonderful widget from the “Lifealyfics” team, where they’ve created a sliding window inside a mobile phone mockup as a way of conveying how something would change over time and in response to user input.
The other thing that I’m going to show here, and I’ll touch on several times in this course, is the importance of trying out multiple different alternative prototypes as a way of getting more valuable feedback from the user.
So, here are different ways that you could present the data that a live logging system is gathering.
Another reason I really like paper prototyping is that everybody can be involved. So, if you try out designs with users, give them a pen and have them modify the interface! Or if they’ve got stuck or think something is weird, grab a sheet of paper and make any modifications that you need.
You can bring paper prototyping tools into the boardroom, you can bring to clients — any of the stakeholders that are involved in user interface design, you can get them involved in paper prototyping.
That helps them get their ideas into the system and empowers them to play a more active role in the design process.
Once you’re ready to move on from paper prototyping, a useful next step can be to make a digital mockup.
Here’s an example of some mockups that my research team made for a collaboration with anesthesiologists in the medical school at Stanford.
The first thing I’d like to point out about this is that you can see that a lot more time went into this digital mockup than into the paper prototypes that we’ve been talking about so far.
And that’s one of the reasons why I think paper prototyping is so important.
But there does come a time where you’ll want to get more specific about pixels, and that’s when digital mockups can play an important role.
As your prototypes increase in fidelity — from storyboards, to paper prototypes, to digital mockups — the kinds of evaluation and feedback that you’re going to get from people are going to evolve also.
So, early on, you might be talking about scenarios with people.
And then, with the paper prototype, you might be running these informal “Try these out, here’s three alternatives” tests.
These prototypes can also be useful for critiques within your design team.
And as you get to higher and higher fidelity mockups, you can have the opportunity to get to more formal experimentation techniques.
Rapid prototyping techniques are probably the most valuable weapon you’ll have in a human-centred design process.
And if you’re interested in learning more, here are some resources that I recommend.
I’ll see you next time.